Showing posts with label Recipes. Show all posts

Thursday, December 06, 2012

Candied ginger, or, how to use two pounds of sugar in one recipe

Guys.  I have exciting news.  You can peel ginger with a spoon!

How I learned this is not an exciting story, but I'm going to tell you about it as if it is.

One of my favorite things about our local Co-op is the at-the-end-of-its-shelf-life-use-it-soon-99¢/lb-produce-bin.  It's often filled with wonderful stuff that is usually much pricier, like apples or sweet potatoes.

So the other day I was at the Co-op (we call it the coop) and there was an especially exciting treat in the discount bin: giant bags of ginger!  I love ginger and I use it all the time, so I snatched one up.  Then I got home and realized that even I might not be able to use that much ginger before it goes bad (or gets freezer burn).  So I decided to make candied ginger.

I found tons of recipes for candied ginger online.  They were all more or less the same, but I ended up mostly using this one from David Lebovitz and consulting this one from Alton Brown.  It was David who taught me the brilliant spoon trick.  Instead of painstakingly cutting the peel off ginger with a knife, trying to get around the curves without slicing off too much of the actual flesh (never works), you can just use a spoon and scrape the skin off.  This worked really well!
 
The candied ginger turned out great!  It's spicy and sugary and delicious.  I like to eat candied ginger plain, but it's also great in cookies or chopped up as a topping over ice cream, or even oatmeal.  This particular batch is destined to be holiday gifts.  I also ended up with about two cups of thick ginger syrup, that I'm sure would be great in cocktails or, again, over ice cream (let's be honest--I'm probably going to it with ice cream).

I'm not going to post the full recipe here because the ones I followed are really good.  But here's an overview:

1. Peel and thinly slice ginger.

2. Simmer in water until tender.  David has you simmer a drain a few times.  Alton only once.  I did it twice.


3. Add a ton of sugar and simmer until there is a thick syrup.  I simmered about 40 minutes--longer than either David or Alton said to.


4. Drain slices of ginger and toss in more sugar.  Let dry for a few hours or overnight.  Enjoy!
 

Friday, May 25, 2012

Curried Cauliflower


You know how sometimes you think you're totally prepared for something?  And then you get started and realize you don't actually have anything you need to complete the task?

No, I'm not talking about studying for my exams.  Although I could be.  I'm talking about cooking.

As I've mentioned before, I don't use recipes very often.  But when I came by a ridiculously humongous head of cauliflower recently, I paged through my cookbooks and found a promising-looking recipe for Curried Cauliflower from Moosewood Restaurant Cooks At Home (yes, I own cookbooks not written by Mark Bittman).  It had lots of things I loved--mustard, apple juice, and best of all, coriander (my new favorite spice!).

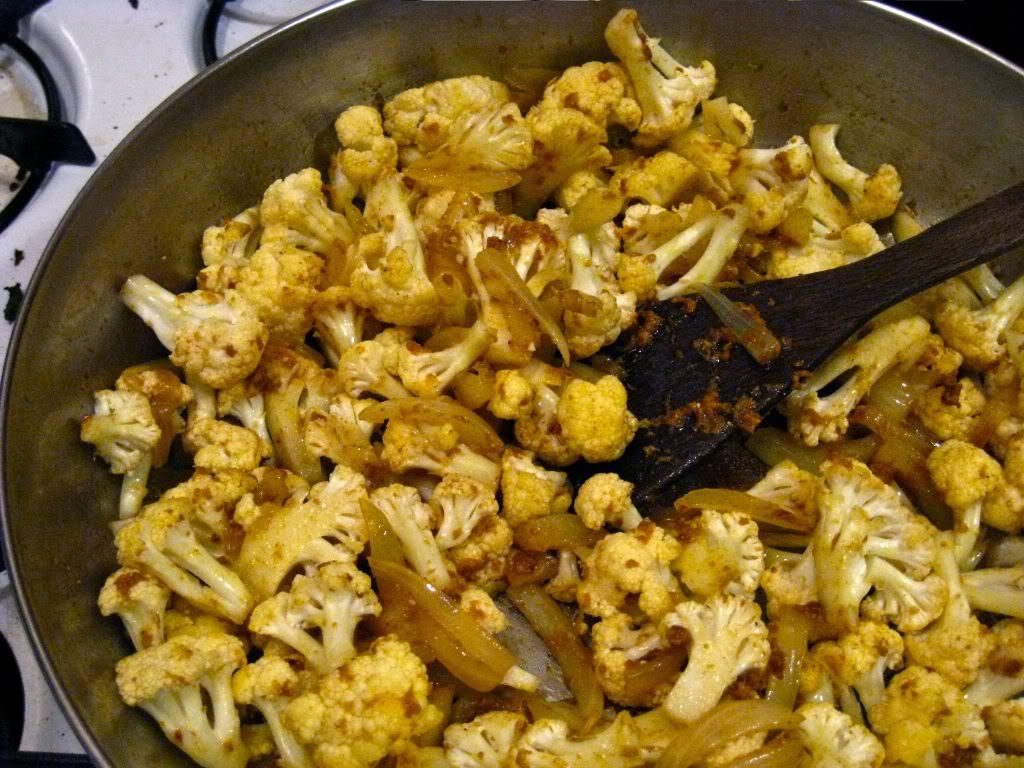
So I went to work making Curried Cauliflower.  I chopped up all the cauliflower, made some apple juice from frozen concentrate (not gourmet, but at least it was 100% juice!), and then realized that I should have actually checked my spice drawer before deciding this was the perfect recipe.  I did not have 4 out of the 11 ingredients.  If you're keeping score, that's more than a third of the ingredients missing.  Whoops.

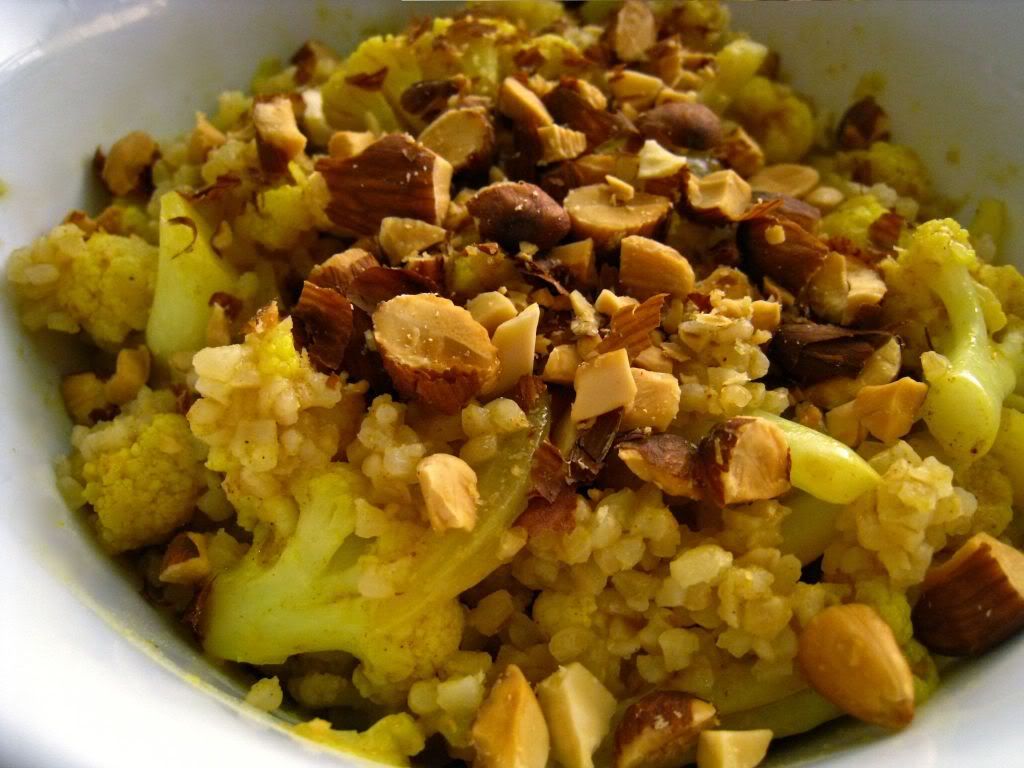
Regardless, I ended up with a pretty tasty dish.  It was kind of tangy and a little spicy.  It probably would have been better with mustard seeds (see the ingredients and my changes below).  I served it mixed up with bulgur and chopped toasted almonds.  It was all basically the same color, so maybe next time I'll serve it with something green.  You know, like a salad.  But on this late finals-week night, simple cauliflower mixed up in a bowl was perfect.

Curried Cauliflower
Adapted from Moosewood Restaurant Cooks at Home

1 medium head cauliflower, cut into florets of nearly equal size
2 Tbs vegetable oil
1 tsp mustard seeds
2 tsp grated fresh ginger root
1 tsp ground coriander
1/2 tsp turmeric
1/4 tsp ground cardamom
1/8 tsp cayenne (or to taste)
1/2 cup unsweetened apple juice
2 Tbs fresh lemon juice
dash of salt

As I said, I deviated quite a bit from the recipe--I didn't have mustard seeds, turmeric, cardamom, or lemon.  So I used a combination of coriander and curry powder, ground mustard, and lemon juice from one of those gross squeezy plastic lemons you get in the produce aisle.  I also doubled the ginger, because I like ginger, and added some thinly sliced onions, because I like onions.

So really, I can barely said I made this recipe.  But I made cauliflower inspired by this recipe!

I'll use pretty generic language for the steps so you can follow using either the original ingredients or some other combination, like I did:

1. Heat oil in large pan.  If using onion, add onion and saute for a few minutes, until it starts to soften.

2. If using mustard seeds, add seeds and cook until they begin to pop.

3. Add spices and cauliflower and toss together.

4. Pour in apple and lemon juices.  Sprinkle with salt, cover, and simmer until cauliflower is tender (about 5 minutes).

Moosewood says that variations include tossing Curried Cauliflower with a cup of plain yogurt or chilling and serving with yogurt and currants.  They also suggest blending leftovers with cooked potatoes, sauteed onions, and plain yogurt or apple juice for a quick soup.

Tuesday, May 08, 2012

Salmon roasted in butter with herbs


I have always loved sea food. Growing up in the mid-Atlantic meant lots of blue crabs, and summers at the beach with a father who loves to fish meant lots of fresh fillets.  I love clams, shrimp, scallops, and even squid.

But I always hated salmon. Yes, salmon, the fish that fish-haters love. And yet I, a fish-lover, hated it. To me it tasted too fishy and the color weirded me out and I just thought is was...icky.

Unfortunately, salmon is kind of a difficult thing to hate. I've been invited to dinner at friends' houses (or worse--friends' parents' houses) many times only to sit down to a fancy salmon entree. Hard to not eat it when someone's prepared it for you. And of course, there are all the health benefits that I read about every time I open a cooking or health magazine.

So about a year ago I decided that I was going to start liking salmon. I started small: I talked a lot about liking salmon. Yes, I needed to take that baby step to get mentally prepared. Then I ate a few bites from a buffet at a work event. Then I tried my aunt's famous whipped salmon mousse at Christmas. When my uncle seared some salmon and I actually really liked it, I decided it was time to try cooking it myself.

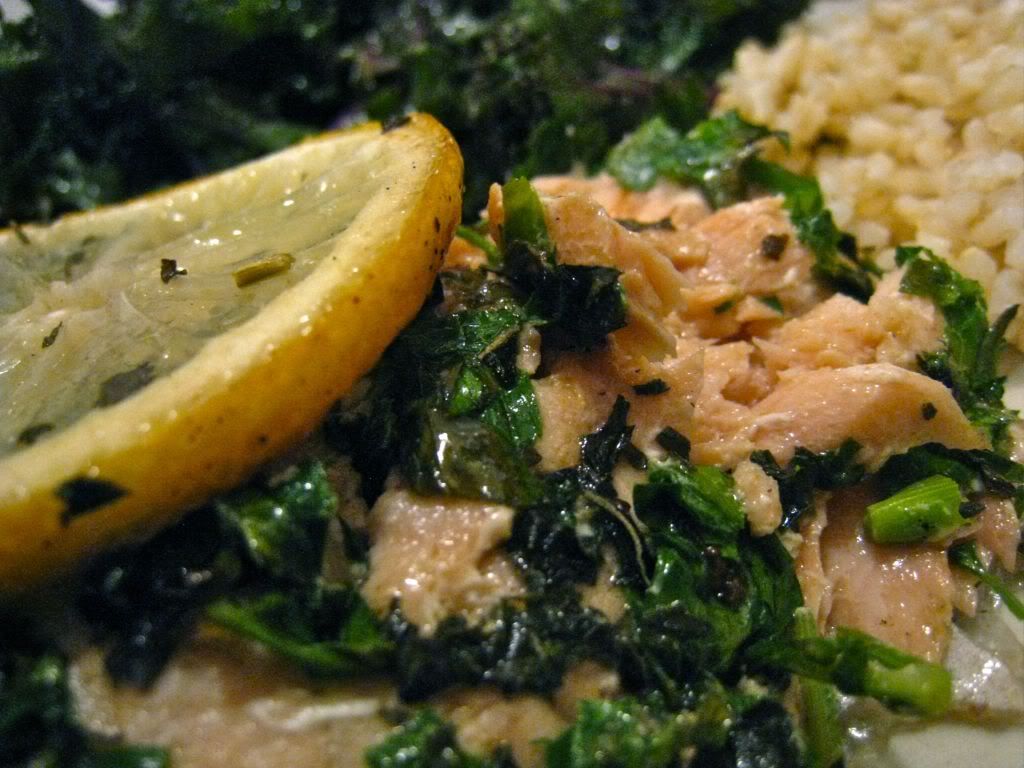
So I bought some salmon. Then, as I always do in times of uncertainty, I turned to Mark Bittman.  And Mark, as he always does, led me to an amazing recipe. It's simple--just salmon roasted in butter with salt, pepper, and fresh herbs sprinkled on top. I added slices of lemon because I love lemon with fish and also because the yellow lemon, green herbs, and pink salmon were pretty. I served it with brown rice and kale sauteed with garlic. It was delicious--and now I can truthfully say that I like salmon!
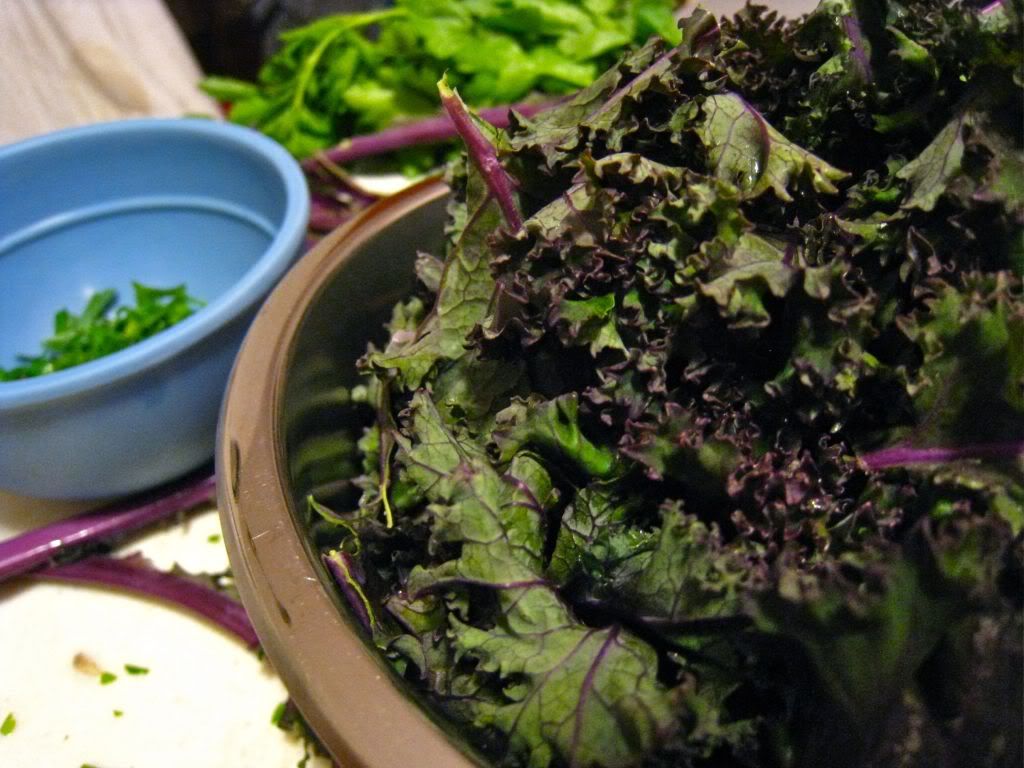
I could eat kale every day!
Salmon Roasted in Butter
Adapted from How To Cook Everything by Mark Bittman

Some butter (Mark calls for 4 Tbs, I think I used 2)
One 2-3 lb salmon filet (I used a few smaller fillets)
Salt and pepper
Chopped fresh herbs (I used fresh parsley and some dried basil.  Mark says you could use tarragon, chervil, basil, dill, thyme, or a combination.)
Lemon, sliced into rounds

1. Heat oven to 475. Melt butter, either in a saucepan, in the oven as it heats, or (my favorite) the microwave. Pour butter into baking pan.

2. Place salmon in baking pan. Sprinkle with salt, pepper, and chopped herbs. Lay lemon slices on top.

3. Mark says to roast about five minutes, flip, and roast for three to six minutes longer until fish flakes easily. I didn't flip mine, and it cooked a little faster since I used small fillets. Enjoy!

Monday, March 26, 2012

Chicken and Lentils--or, how I discovered coriander

Remember when I gave you updates on my not new years resolutions and said that I had made a new recipe, but hadn't posted about it?  Well, here it is!

It's not beautiful, but it's delicious
This post is an ode to Mark Bittman.

I could write many odes to Mark Bittman, but today's ode to Mark Bittman (we call him Marky-Mark) is to thank him for introducing me to the delightful sensory experience that is coriander.

One evening I was flipping through Marky-Mark's How to Cook Everything looking for ways to feed my obsession with my (sort of) new Dutch oven.  I ran across a simple-sounding recipe called Chicken with Lentils.  I had all the ingredients on hand--except for coriander.

I had never cooked with coriander before--I've always just substituted curry powder, figuring it was mostly the same.  But I had just listened to an episode of The Splendid Table in which Lynn discussed a dish made with coriander, and it had caught my interest.  So I made a quick run to the store and got some.


Well, let me tell you, folks, coriander might be my new favorite spice.  Oh my, it is amazing.  It's rich and a little sweet and fills the house with a cozy, slightly cinnamon-y smell (yes, I think a smell can be cozy).  And it's not the same as curry powder.

And aside from the coriander, this dish was amazing!  It's super hearty since it has chicken and lentils, and the parsley adds a really fresh flavor.


Chicken and Lentils
Adapted from How to Cook Everything by Mark Bittman

1/4 cup olive oil
1 large onion, sliced
1 tbs chopped garlic
1 tbs chopped or graded fresh ginger or 1 tsp ground ginger
1 cup chopped tomato (canned is fine)
1 tsp ground coriander
3-4 lbs chicken (I used breasts because I had them in my freezer)
1 large bunch fresh parsley sprigs, tied together
2 3-inch cinnamon sticks
1 cup dried lentils
salt and pepper

In a Dutch oven (or any large skillet with a lid), saute the onions, garlic, ginger, tomato, coriander, and some salt in the oil for just a few minutes.

Add 4 cups of water, the parsley bundle, cinnamon sticks, and lentils.  Cover the Dutch oven and let simmer for about 30 minutes until the lentils are almost done.

Take out the parsley and add the chicken.  Cook covered until the chicken is cooked through (155-165 degrees in the thickest part of the thigh), about 15-25 minutes.

Add salt and pepper to taste.

Friday, February 24, 2012

Summer Rolls, or, Playing With Your Food

I'm obsessed with Vietnamese food.  I mean, really obsessed.  I was fairly devastated when my family's favorite Vietnamese cafe closed in Arlington (it got turned into a CVS, right down the street from where my other favorite got turned into a Crate & Barrel--ahh, gentrification).


Luckily for me, Linn and I live just a few blocks from Nicolette Avenue in Minneapolis, fondly known as Eat Street, known to me as The Street Where I Plan To Try The Pho At Every One Of The Many Many Vietnamese Restaurants.
What's that, you say?  "But Lina, you make such good pho yourself!"  Why thank you!  But it's not quite the same as ordering at a restaurant and, five minutes later, receiving a huge, steamy bowl of noodles, veggies, meat, and broth.


What is the same to make at home, I have discovered, is summer rolls.  Summer rolls are my favorite precursor to pho when we eat out.  In case you're not familiar, summer rolls are traditionally some combination of protein, usually shrimp and/or pork, veggies, and herbs--essentially spring rolls with fresher ingredients and not fried.  They're filling, healthy, delicious, and insanely easy to make at home.


My favorite thing about summer rolls, though, is putting them together.  I really love food that you have to assemble at the table.  Basically, I like to play with my food.  Don't lie--you know you do, too!


In case you want a recipe more specific than "Put fillings in rice paper, roll, dip in sauce," here you go!

Summer rolls

Rice paper (comes in packages of hard sheets--check an Asian grocery store if you can't find it at your regular store)

My favorite fillings:
Shrimp
Chopped napa cabbage
Fresh Thai basil, either chopped or whole leaves
Mung bean sprouts
Shredded carrots

Other possible fillings:
Thin noodles, like vermicelli
Lettuce
Fresh mint
Fresh cilantro
Pork
Tofu

Dipping sauce
1/2 cup soy sauce
1/2 cup rice vinegar or rice wine vinegar
2 tsp sesame oil
2-3 cloves garlic, grated or minced
1-2 TBS fresh ginger, grated minced
1/2-1 tsp red pepper flakes (depends on how wimpy you are about spice--I'm wimpy)
I've seen recipes like this with honey in them, but I've never used it


Start by mixing all the ingredients for the dipping sauce together.  Simple as that.

For the rolls: I like to put each filling ingredient in a little bowl and lay them all out on the table.  You'll also need a bowl or pan big enough for the rice paper to sit flat in.  Put 1-2 inches of water in this bowl.  You'll also need an empty dinner plate to roll the summer rolls.

Dip a sheet of rice paper in the water, swish around for a few seconds, lift it out, and let drain for a few seconds.   Put the rice paper flat on your plate.  It will still be stiff, but will be soft by the time you load it up with fillings!

Place your fillings in the center of the rice paper.  Don't overload it or it will be difficult to roll.  You'll have to experiment!

Rolling these is like rolling a burrito.  Bring one side of the rice paper up and start rolling around the fillings.  Then fold in the sides.  Continue rolling and you're done!  The rice paper will be sticky, so it should all hold together nicely!

If you need some help rolling them, this video is helpful.  Actually, you could probably just watch the video and skip this post entirely....

Enjoy!

Friday, January 27, 2012

Dutch oven inauguration

I know I promised Holiday recap: Part two.  And I know you're all dying to know what the rest of my holiday was like (blogging does imply a certain element of narcissism, doesn't it?), but I decided to break it up with a recipe.

But it still involves one of my Christmas gifts, so it's still sort of keeping with the holiday recap theme.

One of my gifts from my parents this year was a cast iron Dutch oven!  I've been dying for one--specifically one big enough to cook a whole chicken.  A quick Google search will yield many accolades from people who think using cast iron is the only way to cook, and I'm starting to agree. My Dutch oven distributes heat really evenly, once it gets hot it stays hot, even over low heat (even for a while over no heat), it goes easily into the oven, food doesn't stick to it, and it's gorgeous!

There are a few downsides to cast iron, to be sure.  For one, my 7-quart Dutch oven weighs 18 lbs before there's any food in it.  This hasn't been a huge problem for me, but I can imagine that it would be difficult for some people.  More pressing for me is that you have to wash and dry cast iron immediately or else it will rust.  This is annoying sometimes, but mostly it makes me do the dishes in a timely manner, so really that's not a bad thing either.  So I guess the only real problem with the new Dutch oven is that I haven't found a place to store it in my tiny kitchen, so it keeps getting shuffled from the stove to the counter to the table and back.  And actually, the biggest challenge was transporting it from Arlington to Minneapolis.  I ended up carrying it on the plane in a padded and zippered shopping bag.

In the few weeks I've had my glorious Dutch oven, it's already gotten plenty of use.  I inaugurated it by inviting my dear friend Christian over for dinner and making good on my promise to cook a whole chicken.  I didn't follow a recipe, but it ended up sweet and juicy, the vegetables were tender but not mushy, and the wine and spices made the house smell amazing.


As usual, I didn't follow a recipe, but I'll go through what I did.  I almost hate to write the steps out because they make the prep seem long and complicated--and basically I just put everything in the Dutch oven and cooked it.

Also, as always, pretty much every part of this recipe is flexible.  Use as many and whatever kinds of veggies you want (celery, parsnips, or turnips probably would be delicious) and adjust the spices and wine to your taste.  You could also use part chicken broth and part wine (or omit the wine entirely).

1 whole chicken (mine was about 4 lbs, use any size you want, just make sure it's cooked through!)
1 Tbs olive oil
2 medium onions, sliced
3 carrots, sliced on the diagonal
2 medium red potatoes, in one-inch cubes
1 package of mushrooms (I used button mushrooms, but I bet some other kind would have tasted great)
4 cloves garlic (or less...or more!)
salt and pepper
1 bay leaf
rosemary and thyme (I used dried, fresh would have been awesome)
1-2 cups red wine (I used one, wish I had used two)
1-2 Tbs of lemon juice or lemon wedges

Adjust oven rack to lowest position and preheat oven to 250˚.

Heat oil in Dutch oven over medium heat.

Rinse the chicken, sprinkle inside and out with salt and pepper.  Pat dry with paper towels and put in dutch oven.

Cook chicken about 5 minutes on each side, until skin is browned.  Remove chicken from pot.

Add onions, carrots, potatoes, and mushrooms to pot, stir to coat in oil and brown for a few minutes. Add garlic, bay leaf, rosemary, and time and saute for another few minutes until garlic is fragrant (but not burnt!  I tend to burn garlic).

Put chicken back in the pot.  You might have to rearrange the veggies some to make everything fit.  Pour in red wine.

Cover Dutch oven and cook in oven for 1 1/2-3 hours, depending on the size of the chicken and the temperature of the oven.  Mine took a little over 2 hours.  A thermometer should read 165˚ when inserted into the breast (I'm not an expert on meat temperatures and I don't want anyone to get sick, so check on that if you'd like).

Stir in lemon juice or serve with lemon wedges.

Serve with something that will mop up all the delicious liquid!

Wednesday, November 30, 2011

Thanksgiving part two: Project leftovers

I had an idea that I'd spend this week doing a series of posts on creative ways to use Thanksgiving leftovers.  Maybe some kind of turkey soup, bread made with leftover cranberries, or baked mashed potato patties.

But we didn't really have a lot of leftovers.  Well, we had a lot of turkey.  But it was so good the way it was that we've just been eating it.  We didn't have many leftover veggies, and we didn't serve potatoes or cranberries to begin with.

Maybe next year I'll have more fun with leftovers.

I did do a few things, though.  First, I sliced and froze extra turkey.  Done.


Second, I used the turkey bones to make [a lot of] turkey stock.  Since my last stock-making project was not totally successful, this time I consulted Mark Bittman.  He suggested that I roast some veggies first (and said not to bother peeling the onions because we'll just strain the whole thing later--woohoo!) and add some dried mushrooms (which I happened to have).  Apparently both of these steps add "depth" to the stock.  Honestly, there were so many turkey bones and the turkey was so flavorful that the stock might have been fine without the extras, but the stock I ended up with certainly is delicious!  And I probably have at least a gallon and a half.  So some of that will be going into the freezer as well.


Third, I made Stuffin Muffins!  I accidentally made about three times more stuffing than we needed for the turkey, and I ended up with two quart-sized zip-locks in the fridge full of uncooked stuffing.  I baked two batches in cake pans and made the rest into Stuffin Muffins!  This is actually a trick I learned from Alyson, my former housemate who brought that amazing-looking pie on Thursday.

It's really easy.  I packed stuffing into muffin tins and added a little broth.  Then I baked them at 350 degrees for about 45 minutes, declaring them done when they were brown and crispy on the tops and sides.  I ended up with 32 of them, so I froze most of them.  They seem to have frozen well and it will be easy to just grab one or two out of the bag when we want them!  I imagine this would also work well with mashed potatoes.

So basically, this [post-]Thanksgiving, I was grateful for my freezer.

How did you use your Thanksgiving leftovers?

Tuesday, November 22, 2011

Shortcut Gourmet: Microwave poached eggs

I really like poached eggs.  I like the soft consistency.  I like how quickly they make dinner.  I like that they're pretty and people are usually impressed with them.  And I like that you don't need any added fat to cook them (although, give me an egg fried over-easy in butter any day).

The one downside to poached eggs?  They're kind of difficult to make on the stove.  I've seen tons and tons of questions and tutorials on other blogs about how to do it, so obviously I'm not the only one who thinks so.

I tried once to poach an egg on the stove by boiling water and dropping the egg in.  Clearly, I hadn't done my research.  The bubbles in the water broke the egg apart and I ended up with yellow and white egg bits floating in gross milky liquid.


I have since researched how to properly poach an egg on the stove.  I have the expert advice of the Julia Child on my bookshelf, and I've run across many promising-looking internet tutorials.  I was also recently gifted an egg-poaching pan insert by Linn's mother.


But I haven't tried any of these methods yet.  Why?  Because I have an easier way.


I poach my eggs in the microwave.

At one point in my life I had a little plastic tray with a space for two eggs for microwave poaching.  But, like most kitchen gadgets, it really wasn't necessary.  Now I just use a bowl covered with a plate and the whole process takes about five minutes.


How to poach an egg in the microwave:

Start by filling a small bowl with cool water, about half-way.  You want it to just cover the egg.

Crack an egg into the water.  If you put the egg in the bowl before the water, pouring the water in will break the egg apart (I learned that the hard way).

Poke a small hole in the yolk with a knife or toothpick.  You want it to be small, or the yolk will bleed out into the water.

Cover the bowl with a plate and put it in the microwave.  Cook on high for 1 minute.

Lift the plate to let steam out and check the egg.  It probably won't be cooked yet.

Continue cooking in 30-second increments until the egg white is, well, white.  Every 30 seconds lift the plate to release steam (I have developed this method by trial and error and learning the hard way--see below).  Cooking times differ when I do this, but it usually takes about 2 minutes total for the egg to cook.  I like my eggs pretty runny, so cook a little longer for a harder egg.

Microwave egg poaching disclaimer and tips:  I am sharing this not to scare you, but to give you a step-up on the tricks I have learned the hard way!

Occasionally the eggs explode when they're cooking.  I've only had this happen a few of times, and it's never resulted in injury--just in a loud noise and inconvenient water and egg bits all over the microwave.


When this has happened, it has always been for one of two reasons:

1.  I let the egg cook for longer than 30 seconds (after the initial one minute).  So seriously, stop it every 30 seconds to let the steam out.  You usually only have to do this once or twice since the egg will cook really fast!

2. I cooked a second egg and didn't use new water.  I have learned that if you use the hot water from the first egg, it usually gets too hot too fast and explodes.

I hope this doesn't turn you off from poaching your eggs in the microwave--it's really fast and easy, I promise!

Tuesday, November 15, 2011

Asian-inspired mini turkey burgers

Mini turkey burgers with bulgur cooked in broth and bok choy sauteed with leeks

Linn and I are trying to clear out our freezer before Thanksgiving.   Because we're buying a 15 lb turkey.  For four people.

Linn talked me into this because he wants to have lots of leftovers and pointed out that we don't buy good meat very often (we're buying a happy co-op turkey) and we can store extra in the freezer.

Which is great.  Except that our freezer is full, mostly thanks to Trader Joe's.

So the other night, when I was finally starting to think about dinner at 7pm, I dutifully checked the freezer and found ground turkey.  I had just been to the store and had bought green onions, carrots, bok choy, and dried cranberries.  An idea began to form.

I've been on an Asian-food kick lately, and, with a little imagination (plus lots of ginger and garlic), Asian-inspired mini turkey burgers were born.


These were quick and easy--I think grating the carrot was the most difficult step.  And they cooked in 15 minutes!  Including dried cranberries was a minor stroke of genius, if I do say so myself.  They added a perfect bit of zing (yes, I believe that's a culinary term), which goes perfectly with the ginger.  If you don't have cranberries, I think anything sweet would work--raisins, red pepper.

This also marked the first time I've ever used a broiler.  It was brilliant.  In three minutes my mini burgers were crisp and brown and beautiful.


We ate the mini turkey burgers with bulgur cooked in veggie broth and bok choy sauteed with leeks, but we were imagining more exciting ways to eat them.  Like in lettuce wraps with avocado.


So, without further ado (I'm proud of this one), here's the recipe!

16 oz ground turkey (or beef, or chicken)
4 whole green onions, coarsely chopped
1 medium carrot, grated
1 Tbs grated ginger
4 cloves of garlic, grated or crushed
1 Tbs soy sauce
1 tsp sesame oil
1/2 tsp salt
1/2 tsp pepper
handful or two of dried cranberries

Preheat oven to 350°

Mash ground turkey in metal mixing bowl.  For a smoother consistency, put through food processor (I just mashed it up with my hands--or use a fork).

Stir in all other ingredients.  I sort of mashed them in with a fork.

Cover a baking sheet with tin foil.  Shape meat mixture into balls or patties of whatever size you want.  Whatever size and shape you choose, try to be consistent so that they all cook in the same amount of time.


Bake for about 15 minutes.  Time will vary depending on size.  Maybe check after 10 minutes.

Once the patties are cooked through, put in broiler for 2-4 minutes until browned on top.

Sunday, November 06, 2011

Carrot Sweet Potato Soup


I'm celebrating two exciting things.

1. November

2. My new immersion blender

Well, the immersion blender isn't really new.  In fact, I think it's very not new, but it's new to me!  My parents sent it to me because it's been hanging in their pantry for a long time without seeing much use, and I was dying for one.

So thanks Mom and Dad!

To inaugurate the new immersion blender, and one of my favorite months, I made Carrot Sweet Potato Soup.  This is one of my favorite dishes of all time.  I got the recipe from my friend Claire several years ago when I was living in Richmond, and I've been making it obsessively ever since.


This soup doesn't have many ingredients, is a gorgeous color, and smells amazing while it's cooking.

But the real beauty of this recipe is how easy it is to mess with.  If you have a lot of carrots, use more carrots.  Want it sweeter?  Pile in the sweet potatoes.  Don't have sesame oil?  Olive oil's fine.  Onions instead of leeks taste great.  I've added ground ginger instead of fresh.  I've tried it with cumin, cinnamon, and soy sauce.  Like your soup smooth?  Puree in a blender.  Smooth with big pieces of veggies?  Puree half in the blender and leave half untouched.  Or do like I do and blend the whole thing partly, but not all the way smooth, which gives it a chunky, rustic texture without giant pieces of cooked carrots (which I don't actually like that much).  Adding more liquid makes it soupier.  Very little liquid would probably make a good dip or spread.

Seriously, I love this recipe.

It's much prettier than it looks in my awful apartment light.


So here it is!

4 large carrots, peeled and chopped
1 sweet potato, peeled and chopped
1 leek
2 Tbs sesame oil
1.5 Tbs grated ginger
2-3 cups vegetable stock
add salt and pepper to taste

Over medium heat, sautee carrots and leeks for about 3 minutes

Add sweet potato.  Cover and cook for another 3 minutes.

Add ginger, and vegetable stock.

Cover, bring to a boil.  Reduce heat and let simmer for 15 minutes, or until vegetables are soft.

Blend soup in a food processor or with an immersion blender until it has the desired texture.

Add salt and pepper to taste (I like a fair amount of pepper).

Wednesday, November 02, 2011

End of season panic


I've been feeling really panicky lately.

The farmers market ended for the season on Saturday.

No more tomatoes until next August.

Seriously.  August.  I live that far north.

So I've been in last-ditch tomato-preservation mode.  I've already canned 17 quarts of tomatoes and was feeling a little burnt out, so something else was in order.

I read a lot of food blogs, and one recipe that I kept running across was slow-roasted tomatoes.  They looked gorgeous, sounded delicious, and certainly piqued my interest.

Then, a few weeks ago I brought home a container of slow-roasted tomatoes from the Minneapolis Food Swap.  They were one of the best things I've ever eaten.  They have a tart, incredibly concentrated flavor, and they're not tough like some commercial sun-dried tomatoes can be.  And, best of all, they freeze (and thaw) really well!

Between running across the recipe everywhere and then actually getting to experience the amazingness that are slow-roasted tomatoes, they seemed like the perfect way to supplement canning in my frenzy to preserve one of my favorite summer fruits.

So last week I bought a $5 bucket of Roma tomatoes.  I laid them out on newspaper to finish ripening without getting rotten spots.


A few days later they were ready to go, so I rinsed them...


...and cut them into quarters.  On the baking sheet, I drizzled them with olive oil and sprinked with salt and pepper.


Then I roasted them, slowly, for about five hours.  Yes, it takes a while.  It's worth it.


 When they were done, I let them cool, ate a lot of them, and put the rest in the freezer!

Here's the recipe with more details (adapted from Smitten Kitchen):

Roma tomatoes (or any pear or even cherry tomatoes--regular globe tomatoes might have too much liquid, but that is my entirely unprofessional advice)
Olive oil
Salt
Pepper

Wash tomatoes and half or quarter depending on size.  It doesn't really matter, but smaller pieces will cook faster.

Arrange tomatoes on covered baking sheet.

Drizzle with olive oil--I used 1 Tbs per baking sheet.

Sprinkle with salt and pepper.  Don't overdo it!  These really don't need much added flavor.

Roast at 225 for about five hours, checking every hour or so.  Tomatoes should be shriveled, but not completely dried out.  Five hours is how long it took in my oven.  Times could vary drastically.

Are you enjoying my super-exact scientific recipes?

Friday, October 28, 2011

Pho

*Edit: I'm getting the hang of posting recipes--I left out soy sauce and sesame oil.  Whoops!  They're in there now.  Thanks for bearing with me!


Homemade pho with chicken, bok choy, mushrooms, cilantro, green onions, and bean sprouts

It's getting cold in Minneapolis.

Which means it's soup season!

One of my very favorites is pho (Vietnamese noodle soup, in case you're not familiar).  I really love going out to get a huge bowl of it, and we live very near Eat Street, which is filled with super fast, super delicious Vietnamese restaurants.  Unfortunately, being both a student and minimally employed means I don't get to eat out very often.  So when I was having a pretty serious craving the other night, I decided to make pho myself.

Turns out, pho is extremely easy to make.  It's really just broth, rice noodles, some kind of protein (I used chicken, but you could use beef, tofu, whatever), and veggies.  Top it off with bean sprouts, chopped herbs like Thai basil and cilantro, and a squeeze of lime juice.  A lot of people dress it up with hot sauce, but I'm a wimp when it comes to spicy.

Pho is so easy that posting a recipe is kind of silly, but I've never posted a recipe before, so let's give it a try:

8-10 cups chicken or veggie broth
2 chicken breasts, cut into 1-inch pieces
4 cups baby bok choy, rinsed and coarsely chopped if desired
1 cup mushrooms, sliced
6-8 oz flat rice noodles
2 cloves garlic, minced or grated

1-inch piece of fresh ginger, grated
1 tsp ground allspice
1 Tbs soy sauce
1 Tbs sesame oil
chopped cilantro
chopped green onions
bean sprouts
fresh lime

Heat broth until boiling, then add chicken pieces.  Allow to boil until chicken pieces are cooked through.

Add baby bok choy and mushrooms.  Allow to boil for a few minutes until they turn bright green.

Add rice noodles, garlic, ginger, allspice, soy sauce and sesame oil.  Allow to boil for about five minutes, or until rice noodles are soft.

Serve and top with cilantro, green onions, bean sprouts, and a squeeze of lime.